Blog navigation

Latest posts

How Easy it is to Switch to Hygiena® EnSURE® Touch
309 views

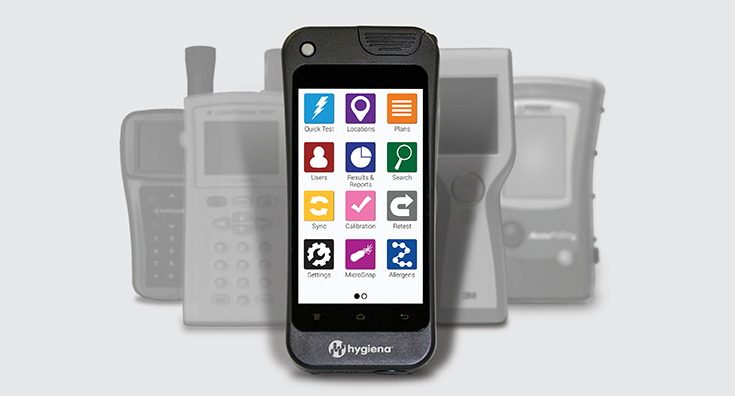
Why the EnSURE® Touch? There is no denying that ATP systems are essential tools for food safety and quality control....

Read more
Our dear colleague..
173 views

💔 It is with profound sadness that I share the heartbreaking news of the passing of our dear colleague and friend,...

Read more
Dental Practice: Protein Residue swabbing for Hygiene Verification
182 views

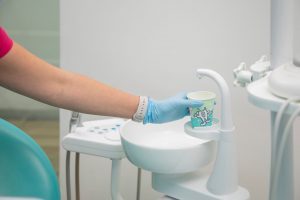
Protein residue hygiene verification can provide several benefits to a dental practice in terms of having a reliable...

Read more
Water Activity (aw) - how it affects food manufacturing.
228 views
When choosing a water activity (aw) meter, you should consider factors such as accuracy, range, ease of use,...
Read more
Which Type of Centrifuge is best suited for your business needs?
176 views
Which Type of Centrifuge is the best suited for your business needs? In this guide, we will discuss the different...
Read more

Swabbing Techniques for Hygiene Monitoring

52 Views
 

At Gem, we talk a lot about the importance of having a robust hygiene monitoring program. But that all falls flat if your swabbing technique isn't up to scratch.

In this blog, we will highlight the best practices to achieve accurate, consistent and reliable results when swabbing surfaces for hygiene and environmental monitoring.

HOW TO COLLECT A REPRESENTATIVE SAMPLE

HOW TO COLLECT A REPRESENTATIVE SAMPLE

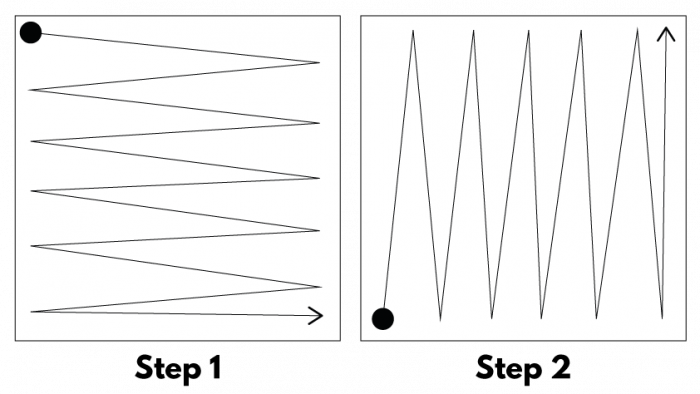
To collect a substantial sample on a flat surface, swab a 10 X 10 cm square. In a hard-to-clean area, swab as much surface as possible. For swabbing inside a cylinder, turn the swab 3 times. This technique applies to all swabs, regardless of brand.

SWABBING TECHNIQUE

SWABBING TECHNIQUE

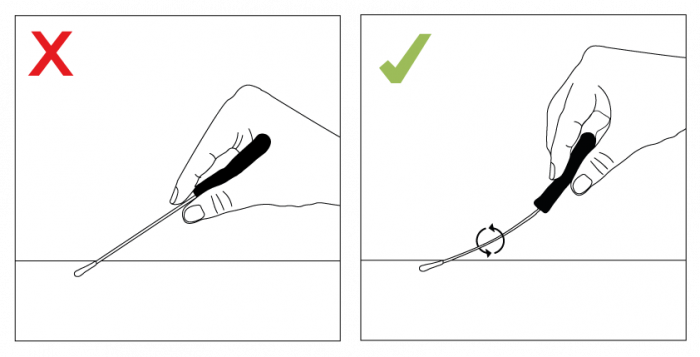
  • DON’T touch the swab shaft or the swab bud
  • DON’T keep the swab straight
  • DON’T lightly swab the surface
  • DON’T Collect a sample only on one side of the tip
  • DO apply pressure to create a flex in the swab shaft
  • DO ensure you’re rotating the swab to collect a sample on all sides of the swab tip
  • DO hold the swab at the top

AFTER SAMPLE COLLECTION

  • Place the swab back into the swab tube
  • Activate the swab (method differs between the swab brand)
  • Shake the swab for five seconds
  • If the swab requires a luminometer, place the swab into the device as soon as possible after activation

TIPS TO HELP YOU OBTAIN THE BEST RESULTS

  • Ensure the swab is at room temperature 10 mins before use
  • Touching the swab shaft or the bud will contaminate your sample with unwanted ATP
  • ALL operators should swab consistently to produce reproducible results
  • Check that conditions are suitable to test e.g. no direct sunlight, dirty surfaces or wet areas
  • Don't activate the test until ready to measure

HOW TO ACTIVATE A 3M SWAB

HOW TO ACTIVATE A 3M SWAB

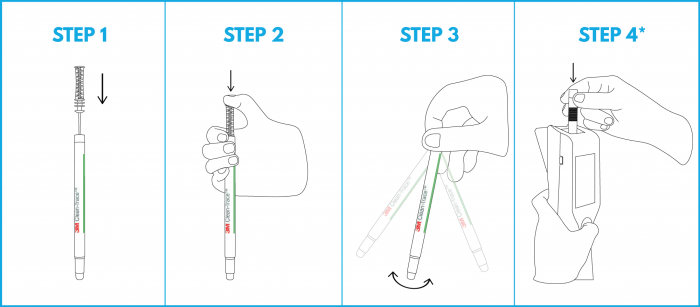
STEP 1 - Once you have taken your sample, place the swab back into the tube. Ensure the swab is kept upright throughout this process

STEP 2 - To activate, push down firmly on the top of the swab. The swab handle will slide down into the tube.

STEP 3 - Hold the top of the swab and shake rapidly side-to-side for at least 5 seconds. This mixes the sample and the reagent.

STEP 4* - Whilst still holding the top of the swab, place into an LM1 to get the RLU reading.
*Step 4 does not apply to the Clean-Trace Surface Protein Plus swabs (colour changing result)

3M CLEAN-TRACE SWABS

To browse our 3M swabs, allergen kits, petrifilm and luminometers, visit our 3M range.


HOW TO ACTIVATE A HYGIENA SWAB

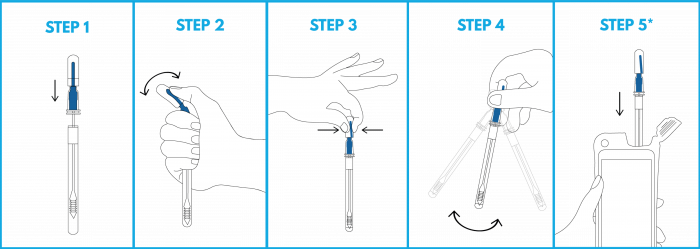
[caption id="attachment_50031" align="aligncenter" width="507"]HOW TO ACTIVATE A HYGIENA SWAB This illustration shows the Hygiena AquaSnap swab. The activation process is the same for all Hygiena swabs[/caption]

STEP 1 - Once you have taken your sample, place the swab back into the tube. Ensure the swab is kept upright throughout this process

STEP 2 - Hold the neck of the swab, use your thumb to bend the bulb forwards and backwards. This motion should break the plastic blue valve at the top.

STEP 3 - Hold the top of the swab and squeeze the bulb twice to activate. This should release the liquid from the top and into the bottom of the tube.

STEP 4 - Keep hold of the top of the swab and shake side to side for 5-10 seconds

STEP 5* - Place directly into the luminometer to get your RLU Reading. Swabs need to be placed into the device no longer than 60 seconds after activation.
*Step 5 does not apply to the following swabs: InSite™ Salmonella Tests, AllerFlow Gluten Swabs, AllerSnap™ Rapid Protein Residue Test, InSite™ Listeria Rapid Environmental Test, MediCheck™ Protein Residue Test, PROClean™ Rapid Protein Residue Test

HYGIENA SWABS

To browse our Hygiena swabs, incubators and luminometers, visit our range. Visit our EnSURE Touch for more swabs compatible with the Hygiena luminometers.


Investing in a new hygiene monitoring system can be daunting, but it doesn't have to be.

When you choose Gem, we work with you to understand your business and what you need from your hygiene system to give you impartial advice on the right system for you.

Our support doesn't stop once you have purchased. Our aftercare assistance is second to none - with free certified product training, specialist aftercare and technical support as standard.

If you would like to discuss your options you can contact us on 01924 444 577, Email us or on LiveChat (during office hours).


This website uses cookies to ensure you get the best experience on our website.